This guide will show you how to use Google SMTP servers to send mail. This can be very helpful if you’re trying to run a blog from home, as most ISP’s block SMTP traffic if you’re don’t have a Business or Enterprise Account.
Click Here to check out my Guide if you are on Ubuntu or Debian based systems.
This guide will cover CentOS and it’s very similar configuration.
Before You Begin
- The Default Hostname “centos” will cause errors in sendmail. Make sure your hostname is set, by using:
hostnamectl set-hostname mail-server
- Update your system:
sudo yum update -y
- Use your web browser to confirm your email login credentials by logging in to Gmail.
Remove Postfix
If postfix is installed on your system, remove it by using:
yum remove -y postfix |
Install Sendmail
We need to install a few packages related to sendmail functionality:
yum install -y sendmail sendmail-cf cyrus-sasl-plain cyrus-sasl-md5 setsebool -P httpd_can_sendmail on |
Generate an App Password for Postfix
When Two-Factor Authentication (2FA) is enabled, Gmail is preconfigured to refuse connections from applications like Postfix that don’t provide the second step of authentication. While this is an important security measure that is designed to restrict unauthorized users from accessing your account, it hinders sending mail through some SMTP clients as you’re doing here. Follow these steps to configure Gmail to create a Postfix-specific password:
- Log in to your email, then click the following link: Manage your account access and security settings. Scroll down to “Password & sign-in method” and click 2-Step Verification. You may be asked for your password and a verification code before continuing. Ensure that 2-Step Verification is enabled.
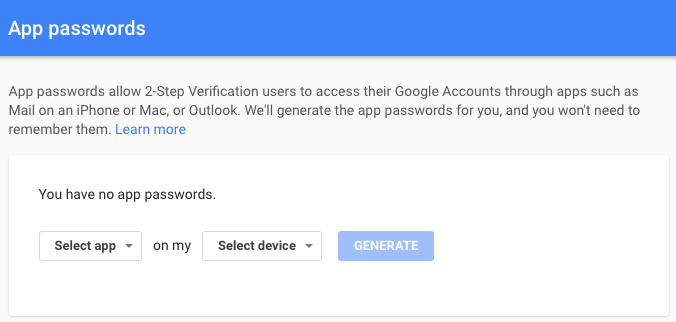
- Click the following link to Generate an App password for Postfix:
- Click Select app and choose Other (custom name) from the dropdown. Enter “Postfix” and click Generate.

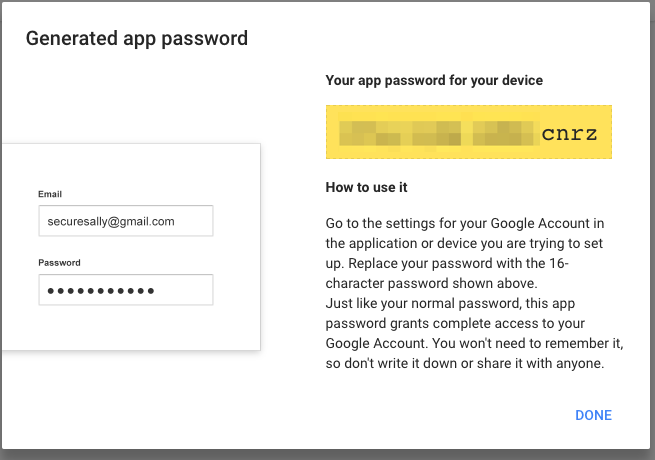
- The newly generated password will appear. Write it down or save it somewhere secure that you’ll be able to find easily in the next steps, then click Done:

Add Gmail Username and Password to Sendmail
Run these commands:
mkdir -p -m 700 /etc/mail/authinfo echo 'AuthInfo: "U:root" "I:[email protected]" "P:app-password-you-got-from-google"' > /etc/mail/authinfo/gmail makemap hash /etc/mail/authinfo/gmail < /etc/mail/authinfo/gmail |
These commands make a directory to store your credentials in, then hash them so that they aren’t stored as plain text on your system.
We need to add the following lines to /etc/mail/sendmail.mc just ABOVE the first MAILER line. It should be toward the bottom of the file.
define(`SMART_HOST',`[smtp.gmail.com]')dnl define(`RELAY_MAILER_ARGS', `TCP $h 587')dnl define(`ESMTP_MAILER_ARGS', `TCP $h 587')dnl define(`confAUTH_OPTIONS', `A p')dnl define(`confAUTH_MECHANISMS', `EXTERNAL GSSAPI DIGEST-MD5 CRAM-MD5 LOGIN PLAIN')dnl define(`confCACERT', `/etc/pki/tls/certs/ca-bundle.trust.crt')dnl TRUST_AUTH_MECH(`EXTERNAL DIGEST-MD5 CRAM-MD5 LOGIN PLAIN')dnl FEATURE(`authinfo',`hash -o /etc/mail/authinfo/gmail.db')dnl |
Once configuration has been updated, we can proceed with “compiling” that new configuration and starting the daemon for the first time.
make -C /etc/mail systemctl start sendmail |
The easiest test is sending an e-mail via command line:
echo "Subject: Test via sendmail" | sendmail -v youremail@example.com |
If there are issues, you can always check journal for startup errors:
journalctl -xe |
The most common error is “available mechanisms do not fulfill requirements” and that signals Cyrus SASL plugins are not installed for MD5 and PLAIN methods. Make sure cyrus-sasl-plain and cyrus-sasl-md5 packages are installed. If Sendmail is taking a long time time to start or send mail, check your hostname with hostnamectl. If it is still the default, change it using:
hostnamectl set-hostname mail-server |
Also make sure your hostname has been added to the /etc/hosts file